You don't the permission to view this video
You’ve decided what color your going to repaint your house and trim and you’re ready to get started. But wait. Don’t forget to prep the siding first. Prepping exterior wood siding for a fresh new coat of paint is perhaps the most important thing you can do to ensure a long-lasting finish that doesn’t flake off after a short time. This video will take you through the exterior paint prep steps that are essential before you start painting.
Is your home in need of some curb appeal? There’s perhaps no better and more affordable way to add interest to your home’s exterior than by giving it a fresh new coat of paint. Whether it’s time to try a new color, or apply a fresh coat of the same, an exterior painting project will help protect your home’s siding and trim from the elements. And it’s something most do-it-yourselfers can do themselves. All it takes is the right products and some advice from your local home improvement retailer.
In this first video of our two-part series on exterior painting, we’ll show you how to prepare the surface to make sure the paint properly adheres to the substrate. We’ll demonstrate the best methods for cleaning the surface and removing flaking paint. And we’ll give you the same surface preparation tips the pros use to ensure your finish will last for years to come.
So let’s get started.
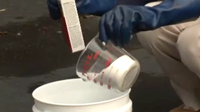
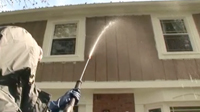
The first step in any painting project, whether painting inside or out, is to make sure you have a clean surface to start with. To clean the siding of this house, we’re going to mix up a solution of one gallon of water, one cup of Tri Sodium Phosphate (TSP) and one cup of bleach into our sprayer tank. We’ll spray our cleaning and de-glossing solution onto the siding working in small areas. Then we’ll rinse with our pressure washer, making sure we use a low angle, as well as a low-pressure tip designed for washing siding, like the one I’m holding here. As you’ll notice I’m fully protected during this process, wearing a rain coat, rubber gloves and safety goggles.
I’ve also placed drop cloths and plastic sheeting on plants and anything else that might be damaged by this powerful cleaning solution. We’ll start from the top and work our way down, working from side to side.
One word of caution here: pressure washers can be dangerous. Be sure to read and follow the manufacturer’s instructions that came with your pressure washer. And never get the nozzle too close to the siding, as you may damage the wood. Under high pressure, water from a pressure washer can etch wood, or drive water deep within the wall cavity, where it can lead to mold. As tempting as it may be to use the pressure washer to blast of loose point, we’re only trying to clean the siding and trim at this point.
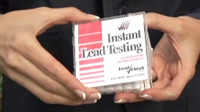
Now that the siding and trim are clean, you need to give the surface plenty of time to thoroughly dry. This might take several days, but it’s crucial that you don’t apply paint or primer on a wet surface. This is one of the leading causes of paint failure. When the surface is dry, it’s time to check for lead paint before going any further. Our house was built in 1972, and any home built before 1978 may contain lead paint. Following the manufacturer’s instructions that came with our lead paint test kit, we see that our siding does not contain lead paint.
That’s a relief.
Now we can proceed to the most difficult, yet unavoidable part of the project … scraping and sanding.
Scraping loose paint from the siding is the most time consuming and exhausting part of this project. But it has to be done to ensure proper adhesion. Some of the different ways to remove paint from siding include power scrapers, chemical strippers and even heat guns. But we won’t need those for our project.
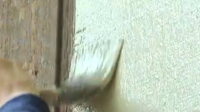
The tool we’ll lean on most to make the job go as smoothly as possible is this carbide blade scraper. It has a handle that you hold with one hand, then with the other hand on the grip, pull the tool toward you. Watch those loose paint flakes fall right off. Never push the scraper away from you or you could damage the siding. For the small channels in between siding panels, this stiff blade 1” scraper will do the trick. Just take your time and work the tool to lift up on the edges of the flaking paint to get underneath it. Soon you’ll see the fruits of your labor paying off as more of the bare wood is revealed. But we’re not there yet.
One thing most amateurs forget in exterior paint prep work is sanding. With my random orbit sander and an 80-grit sanding disk, I’ll feather the edges as best I can so there won’t be any seams between the old the new finish coat. We can also use the sander to de-gloss any surfaces where adhesion may be a problem, like on this trim Just be sure you wear a dust mask to avoid inhaling any sanding dust.
Finally, we’ll pull any nails and repair any cracks with some exterior glue, using a few finish nails to hold it while the glue dries. We’ll also fill any nail holes with this exterior wood filler and our putty knife. This will ensure no water penetrates the surface of our siding, which is key to making our siding, and our paint finish, last . Now we’ll sand our patches smooth with our random orbit sander. For areas we can’t reach with the sander, this sanding sponge will do the trick.
There you have it. While that certainly took some time and effort, it was well worth it. Now we’re ready to prime and paint the surface knowing that we’ve taken the proper steps that will make our finish last for years to come. Next up: priming, caulking and painting.
If you have questions about this or any other home improvement project, be sure to read our list of Frequently Asked Questions for this video. And be sure to print out our Project Instructions, which includes a Tools and Materials checklist, before visiting your local independent home improvement retailer. That’s where you’ll find all the products and helpful advice to complete your project. If you’re not sure where to find your local store, check our Store Locator. Good luck with your project and thanks for watching.
Steps
- 1.

Mix up 1 cup of Trisodium Phosphate, 1 gallon of water and 1 cup of bleach. Spray on siding using a pressure washer or garden hose sprayer.
- 2.

Strategically place drop clothes down to protect the ground from the cleaning solution.
- 3.

Spray the cleaning solution onto the walls with a pressure washer. Then rinse the walls down with water. Allow to completely dry for several days before painting.
- 4.

If your house was built before 1978, you’ll need to test the paint for lead. If you find the paint contains lead, contact a professional painter to remove the paint.
- 5.

Scrape off the paint using various tools such as a carbide blade scraper, a sander, chemical strippers or heat guns.
- 6.

Smooth edges with a random orbit sander.
- 7.

Remove any protruding nails and repair any cracks in the wood with exterior wood glue. Fill nail holes with wood filler and a putty knife.
- 8.

Smooth down patches with the sander.
- 9.

Watch the video “Exterior Prime, Caulk and Paint” for the next steps.


Particularly in areas subject to mold and mildew, like the Seattle WA area, one must take extreme pains in flushing the TSP off of the house. TSP residue is a perfect fertilizer for mold and mildew. TSP is great, just don’t let any remain in cracks and fissures. Peace, Bob