You don't the permission to view this video
If water from your toilet tank is leaking into the bowl, the first suspect generally is the flush valve. In this video, we’ll show you how to remove the tank from the bowl to replace a flush valve and stop the leak. If you need to replace your entire toilet, you may be interested in our How to Replace a Toilet video.
If your toilet is leaking, the first suspect generally is the flush valve. Now if you’re not sure what the problem is, you might want to watch our video "Diagnosing a Leaky Toilet" to figure out which component inside the tank is leaking. Otherwise, stick around and I’ll show you how to install a new flush valve on your toilet.
The good news is that repairing a toilet is easy. It won’t cost you much or take up much of your time. As always, you’ll find all the parts and tools you need to finish this project, along with answers to your plumbing questions, right here at your local independent home improvement retailer.
The flush valve is in the middle of the toilet. When you push the lever, the flapper mechanism raises to let water out of the tank and into the bowl.
Some leaks can be fixed by simply replacing the flapper. If that’s all you think you need to fix the leak, check out the FAQs section of our website for more information.
Here, I’m going to show you how to replace the entire flush valve. That will include both the flapper as well as the seat that helps create the seal to keep water in the tank. To install it, you’ll need to remove the toilet tank from the bowl. Don’t worry this is easier than it sounds. So let’s get started.
First, take the lid off the tank.
Then shut off the water to the toilet by turning the shutoff valve clockwise.
Drain the water out of the tank by holding down the tank lever. Use a sponge or a towel to remove the water that doesn’t drain out. Now, disconnect the water supply to the tank. You may need an adjustable wrench or a pair of channel locking pliers to loosen the connection.
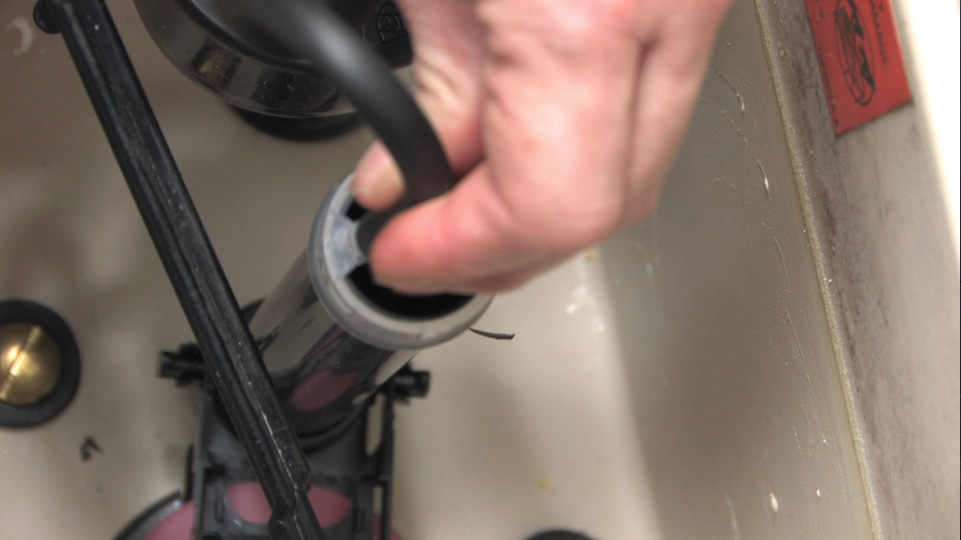
Disconnect the chain attached to the flapper. Also disconnect the refill tube that’s attached to the top of the overflow pipe.
Now, we’re ready for the most difficult part of the project: disconnecting the tank from the bowl. Underneath the tank, you’ll see bolts that go through the tank and bowl flange. Unscrew these, and be careful. If they are difficult to remove, use penetrating oil to loosen them. If you try to force them, you could break the tank. To keep the bolt from moving while you loosen the nut, use a large screwdriver to hold the top of the bolt inside the tank.
Once the bolts are removed, lift the tank away from the bowl and place it on a towel on the floor so you don’t scratch it. Tanks can be heavy, so you may need help with this step.
You’ll see there is a large rubber gasket between the tank and bowl. Remove this gasket and save it. Some kits come with a replacement gasket and some don’t. So keep it just in case. They can also be purchased separately.
Unscrew the large lock nut holding the flush valve to the tank. Again, be careful how much force you use, as you don’t want to break the tank. Use a plumber’s wrench or a large pair of locking pliers with adjustable jaws.
After you’ve removed the old flush valve, attach the new one pretty much the same way the old one came off. The rubber gasket goes on the inside of the tank to prevent it from leaking. The lock nut fits on the outside. Hand tighten the lock nut, then five it an extra ½ turn with the plumbers wrench. Don’t over-tighten or you may risk cracking the tank.
Use new brass tank bolts to attach the tank to the bowl. Hand-tighten the nuts evenly and remember not to over-tighten them or you risk cracking the tank.
Connect the flapper chain to the tank lever, leaving some slack for when the flapper is closed. Then, reconnect the water supply tube to the overflow pipe, turn on the water, and your toilet should work like new.
If you have questions about this or any other home improvement project, be sure to read our list of Frequently Asked Questions for this video. And be sure to print out our Project Instructions, which includes a Tools and Materials checklist, before visiting your local independent home improvement retailer. That’s where you’ll find all the products and helpful advice to complete your project. If you’re not sure where to find your local store, check out our Store Locator. Good luck with your project and thanks for watching.
Steps
- 1.

Remove lid from tank.
- 2.

Shut off water by turning the shut-off valve clockwise.
- 3.

Drain as much water out of tank as possible by holding flush lever down until toilet is completely flushed.
- 4.

Sponge or towel out any remaining water in the tank. A shop vac also works well.
- 5.

Disconnect water supply tube or hose to tank.
- 6.

Disconnect flapper chain from tank lever arm.
- 7.

Disconnect refill tube attached to top of overflow pipe.
- 8.

Underneath tank, unscrew bolts that hold tank to bowl. You may need to spray them with some penetrating oil first before trying to loosen them.
- 9.

Reach in tank with a long slotted screwdriver to keep tank bolt from turning while loosening nuts under tank with an adjustable wrench. Remove tank bolts.
- 10.

Lift tank off of bowl and set aside on towel.
- 11.

Underneath the tank, unscrew the locknut holding flush valve to the tank using a plumber’s wrench. Remove old flush valve.
- 12.

Install new flush valve the same way you removed the old one, following manufacturer’s instructions.
- 13.

Once installed, reattach tank to bowl with tank bolts.
- 14.

Reattach flapper chain to flush lever arm.
- 15.

Reattach fill tube to new overflow pipe.
- 16.

Reconnect water supply to tank.
- 17.

Turn on water, test new flush valve and check for leaks.


Who knew that changing a flush valve could be so easy?
I had to use the knowledge I learned from this video this morning as I ended up having to completely replace the flush valve and fill valve on my toilet. Only took me about 30 minutes to do both, and most of that time was just in dealing with stuck fasteners and other connections.